By James Booth
They say, "Necessity is the mother of invention." I disagree. I think that photographers are the "mother" of invention.
Do you think you need to spend hundreds of dollars on seamless muslin backgrounds to have studio-quality portraits? Well you don't, and I'll show you a few methods that work well for me and yield rather nice results for very little money.
Harvesting household items
One of the cheapest and most readily available household items that can be used as a backdrop is that big blanket you have folded up in the closet. Blankets, quilts, and bedspreads make readily accessible backdrops and come in a variety of sizes, colors, and patterns. My father, also a photographer, once told me "the blue blanket is the photographer's best friend." In Figure A, you can see he was right, as a blue blanket makes an excellent backdrop.
FIGURE A
Don't let your backdrop make you blue. Get a blue blankey. (click for larger image)
Patchwork quilts will give a nice, homey, country feel. Character or cartoon-based children's bedspreads or comforters make good backdrops for children's portraits. [Do be aware, however, that if you do use a character or cartoon-based backdrop, and you plan to have your image published, there may be licensing or copyright issues involved. -- DG]
Look around your house; there are a lot of things that have unique textures, coloring, or patterns. In Figure B, I used my patio umbrella as a backdrop by laying it on its side.
FIGURE B
Be creative. Feel free to use found objects. (click for larger image)
Don't discount things like area rugs, tapestries, or drapes either. Anything with interesting color, texture, or patterning can be a backdrop.
Make sure you take into account variations in contrast though. Take Figure C for example.
FIGURE C
Be aware of the exposure differences between foreground and backdrop. (click for larger image)
I used a beautiful antique piano with a uniquely carved sound panel as the backdrop. But because I exposed for the light color of my daughter's clothes, the piano came out too dark and you can't see any of the beautiful, handcrafted woodwork. I very easily could have remedied this by illuminating the piano with a separate light, like a snoot, or adjusting my exposure. It didn't occur to me at the time, the image suffered as a result, and I didn't know until after the film was developed.
Do it yourself
How would you like to have one of those vari-colored, mottled backdrops like the professionals use? Those seamless muslin ones often sell for hundreds of dollars. Yeah, I wanted one too, but couldn't afford one either. So I made my own, and you can too. It's quite simple.
In my case, I wanted a gray one, so I started with a white sheet. I got a cheap, single-size flat sheet from a local discount store and a bottle of medium gray dye. The size of sheet you get depends greatly on your needs. Sometimes I wish I had gotten a king-size sheet. Anyway, I mixed up the dye in a bucket, wadded up the sheet, and stuffed it into the dye. Periodically, I would turn the sheet this way and that in the bucket. After the time prescribed by the dye directions, I pulled the sheet out, rinsed it according to the directions, and tossed it in the dryer. I keep that sheet wadded up in a bag with several other sheets I use for backdrops. By keeping it wadded up, it wrinkles the material, adding texture and shading, just like those expensive seamless backdrops. Figure D shows the results of my do-it-yourself mottled gray backdrop.
FIGURE D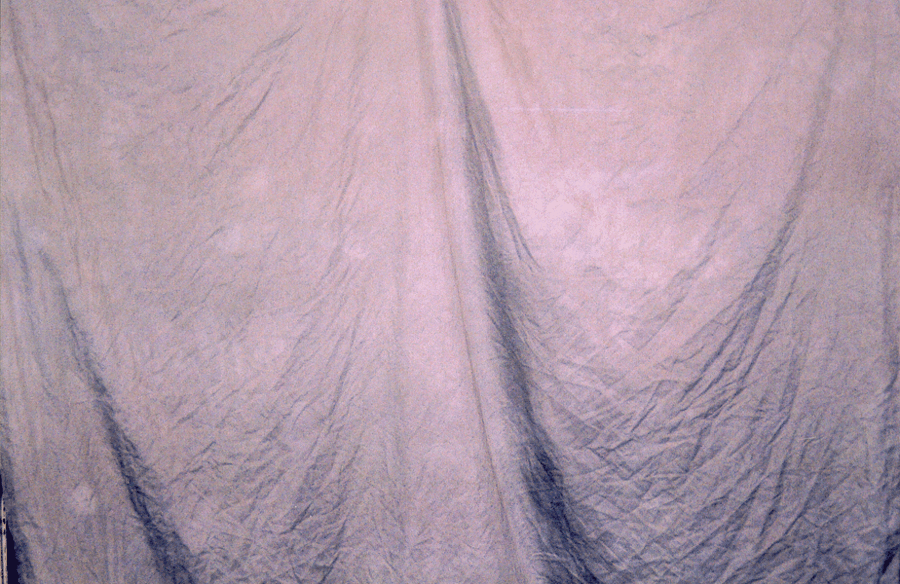
A sheet and some dye can work wonders. (click for larger image)
Let's make a backdrop
Just to show you how easy it is, let's make another one. I chose a light blue sheet to use as the material for this budget backdrop. For the colors, I chose RIT fabric dye Tan #16, Royal Blue #29, and Denim Blue #36.
You'll want to hang the sheet -- or lay it flat -- someplace that won't be ruined by the dye, such as a basement, garage, or outside. Then, starting with the lightest color first, spray the dye onto the dry material in whatever pattern catches your fancy like I did in Figure E.
FIGURE E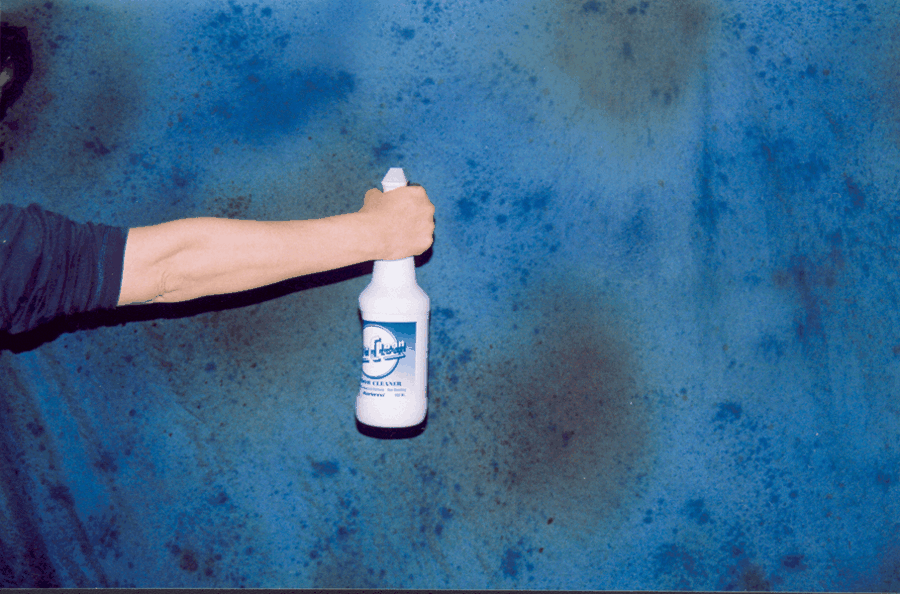
Have spray bottle, will dye. (click for larger image)
Each successive coating should be a darker color than the previous application because the lighter colors won't show if sprayed onto a darker color. I recommend a very strong concentration of the dye. Not straight dye, but about 50/50.
You will get the best results by applying the dye to dry fabric. You'll want to rinse and dry the fabric between dye applications. After rinsing and drying, the color will be considerably lighter than when first applied, so keep this in mind when choosing what colors to use. You may want to go several shades darker in order to get the finished color you want.
Figure F shows the completed backdrop. You'll notice a few spots where I let the highly concentrated Denim Blue dye sit on the material too long, but overall I'm happy with the results.
FIGURE F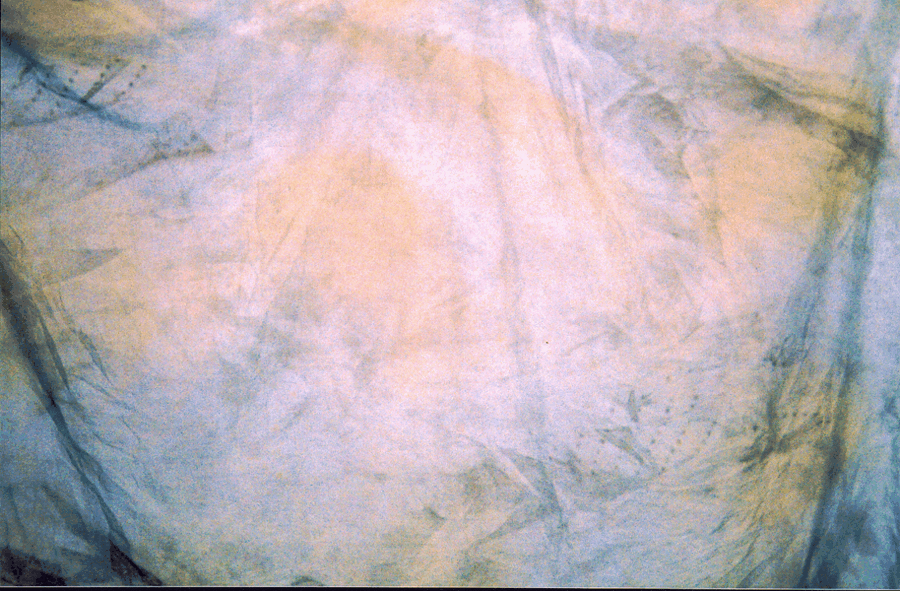
I'm happy with my completed backdrop. (click for larger image)
I used a spray bottle, but you can apply the color by any means you have at your disposal. Personally, I think an airbrush would do a better job. If you have one available, you could probably get even better results than what I got with the spray bottle. You don't have to use dye either. I would imagine that spray paint would yield results somewhere between a spray bottle and an airbrush without the color fade inherent in the dye. Way back in the 70s, my father hand-painted his own backdrop on a piece of canvas.
Conclusion
You don't have to spend hundreds of dollars to have a nice seamless background. Sheets, blankets, and bedspreads are a ready source of inexpensive backdrops. You can even make your own, tailored to your own tastes and needs, for very little money.
If you store these backgrounds wadded up, the wrinkles will provide added texture. In addition, don't hang them perfectly straight. By hanging one side higher than the other and adding a droop or fold in the material, it breaks up an otherwise drab background with depth and texture. Good luck and good shooting.
James Booth is a self-taught PC and Palm device user that dabbles in graphics and photography. He can be reached at lizardworks@mchsi.com.