By James Booth
How many of you have seen Kim Anderson's hand-colored photos and wished you could reproduce that effect with your own images? Well now you can, and it's not as hard as you'd think. With the techniques I'll give you in this article, you'll be hand-coloring your own pictures into beautiful works of art in no time flat.
Once upon a time, if you wanted to get the Kim Anderson effect, you had to do it in the darkroom with various color filters, or with the artist's palette and special paint designed for photos. Digital image manipulation has dramatically changed the face of photography by moving the darkroom into the computer, allowing virtually anyone to create stunning special effects with very little effort.
Let's get started
Apart from an image to hand color, you're going to need an image editing program. There are quite a few available with the most popular being Adobe Photoshop. As awesome as Photoshop is, it comes at a pretty high price, and not everyone can afford that price. Paint Shop Pro is one of the more cost-minded alternatives to Photoshop. For the seriously budget-minded, GIMP is a free, open-source image editor comparable to Photoshop. I have Photoshop, so that's what I'll be using for this article.
First, you'll want to choose an image to hand color. Once you have the image loaded into your photo editor, make a back-up of the image in PSD format, like shown in Figure A.
FIGURE A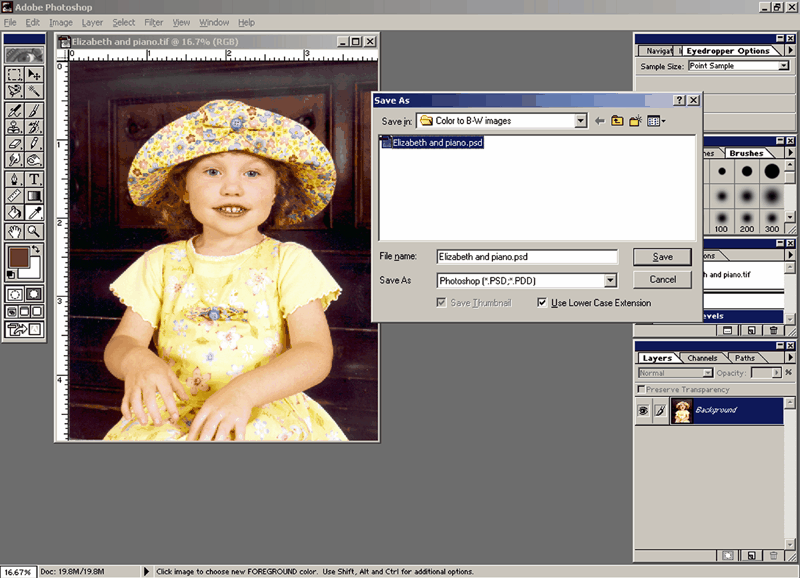
Make a back-up of the original image. (click for larger image)
This is a Photoshop format that's uncompressed and doesn't require flattening, or layer merging. The file will be rather large, but this is just our working image and can be deleted once the project is complete. This PSD file is the image that we'll actually be editing, leaving the original image in tact.
Next, we want to create a duplicate layer of this image. Pressing the right-hand arrow in the layer window will open the layer menu like in Figure B.
FIGURE B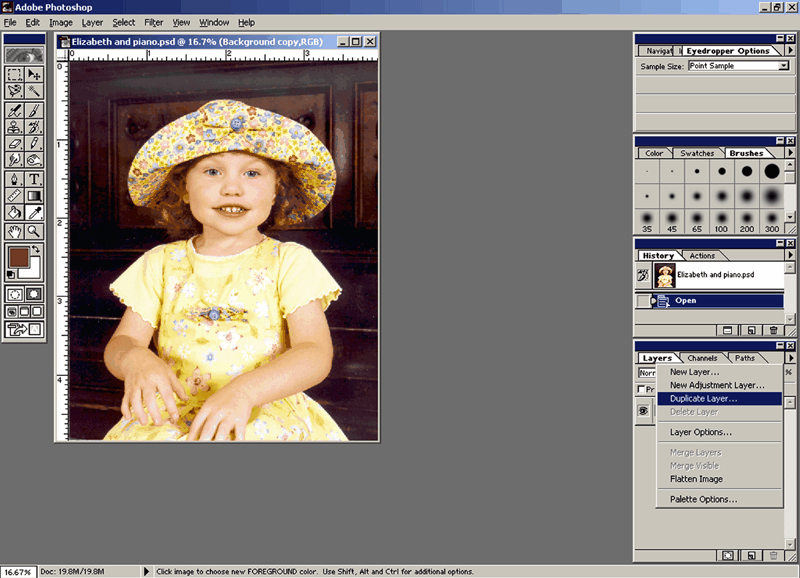
Create a duplicate layer of the image. (click for larger image)
Select Duplicate Layer from the menu. You can now remove/delete the Background layer. Duplicating the Background layer will give you a higher degree of control and editing options for the image than if you just left the Background layer.
Removing the color
In order to make the hand-coloring stand out, we'll need to convert the image to Grayscale. From the menu, select Image->Mode->Grayscale, like in Figure C, to convert the image to Grayscale.
FIGURE C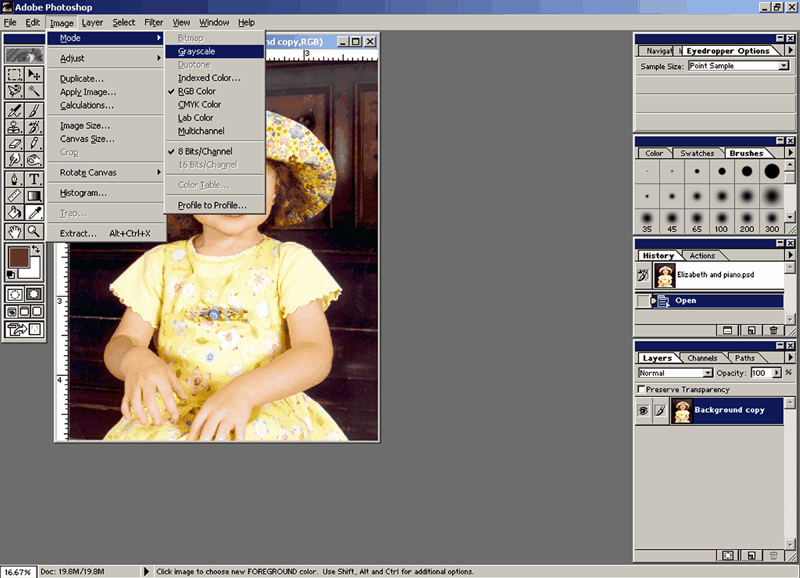
Converting your image to Grayscale will remove all color. (click for larger image)
By converting the image to Grayscale, all color information for this image will be removed. Next we want to add that vintage Sepia toning effect. You can actually use any color tint you want; I myself prefer a kind of brownish-maroon, or cordovan tint. To do this, we need to convert the image to Duotone by selecting Image->Mode->Duotone, like in Figure D.
FIGURE D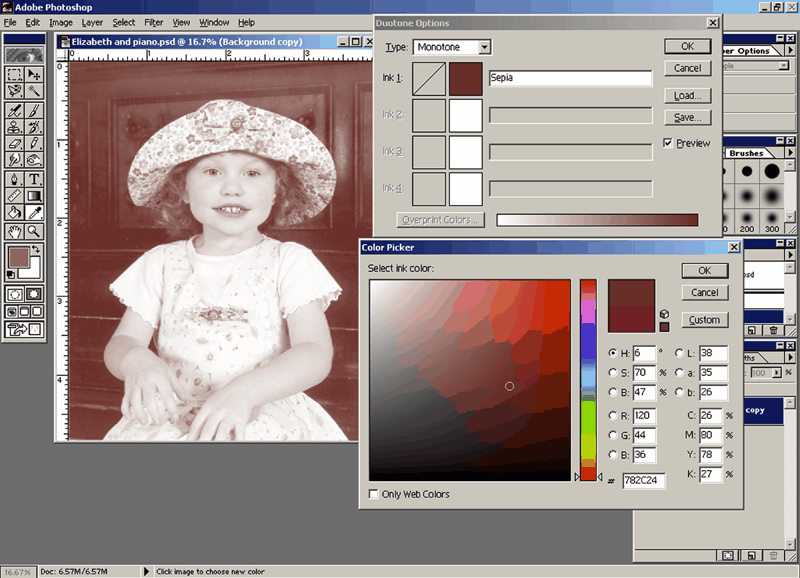
Convert the image to Duotone and give it your chosen color tint. (click for larger image)
The Duotone Options window will open allowing you to name your color choice. The default color that's chosen is black, but by clicking on the color box, Photoshop's color picker window will open, letting you choose your color by either moving the selector over the color you want, or by inputting the appropriate numbers for HSB, RGB, Lab, or CMYK. You can see that I went with a maroonish-brown.
As a side note, Photoshop's color picker will give you these number values for any color merely by moving the selector around the color selection area. By moving the slider up and down the color bar, you have complete access to all 64 million (or however many) colors in the scale.
Alternatively, if you want to go with the standard Sepia toning effect, Photoshop will do that for you. If you select the Actions tab in the History/Actions window, you'll find a list of pre-programmed editing actions that Photoshop can automatically execute for you. Scroll down the list to Sepia Toning, click on it, then click the Play button (right-hand facing arrow like on your CD or tape player) like in Figure E to complete the Action.
FIGURE E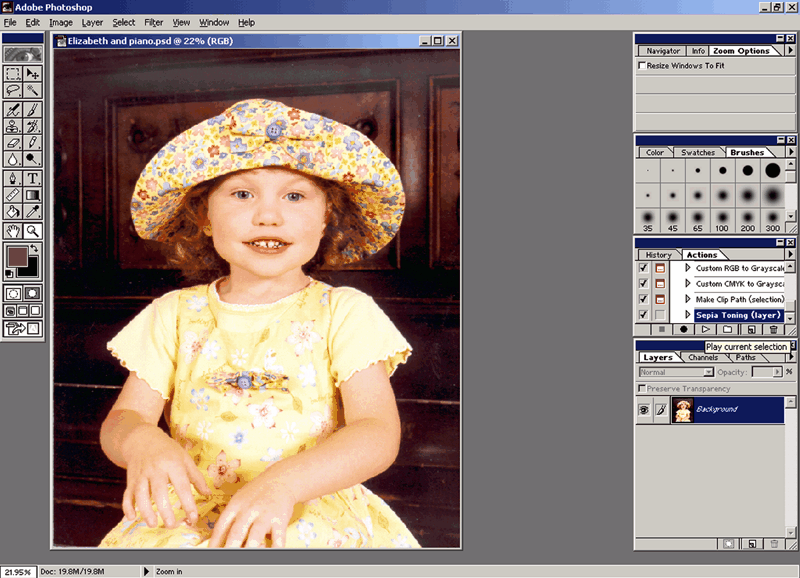
Photoshop can automate Sepia toning for you. (click for larger image)
Coloring by hand
We're now ready to start hand-coloring our image. But right now, the image is only Duotone. We want to be able to use any color we want, so we'll have to convert this image back to RGB by selecting Image->Mode->RGB like in Figure F.
FIGURE F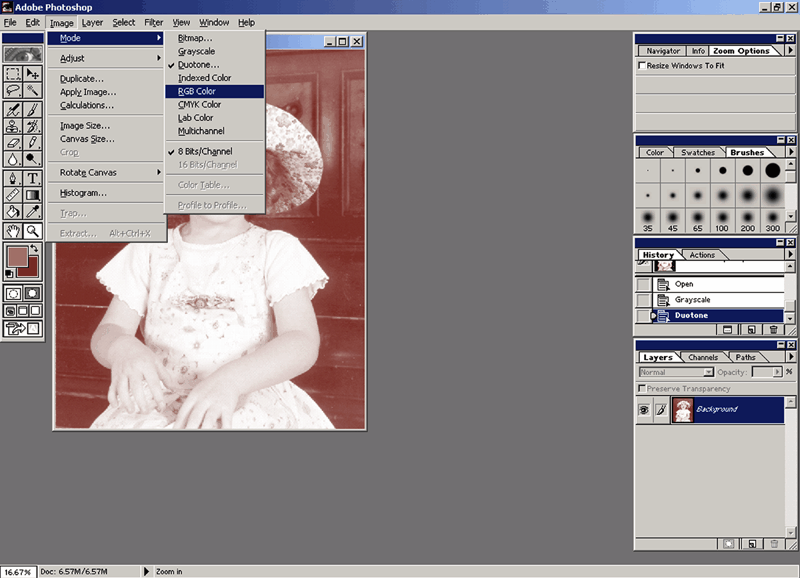
Convert the image back to RGB so we can color it. (click for larger image)
We won't be doing the coloring directly on the image, but on a transparent layer on top of the actual image. This preserves the integrity of the image in case we screw something up. To create a layer, activate the layer menu by clicking on the right-hand arrow in the Layer window, as shown in Figure G, and select New Layer.
FIGURE G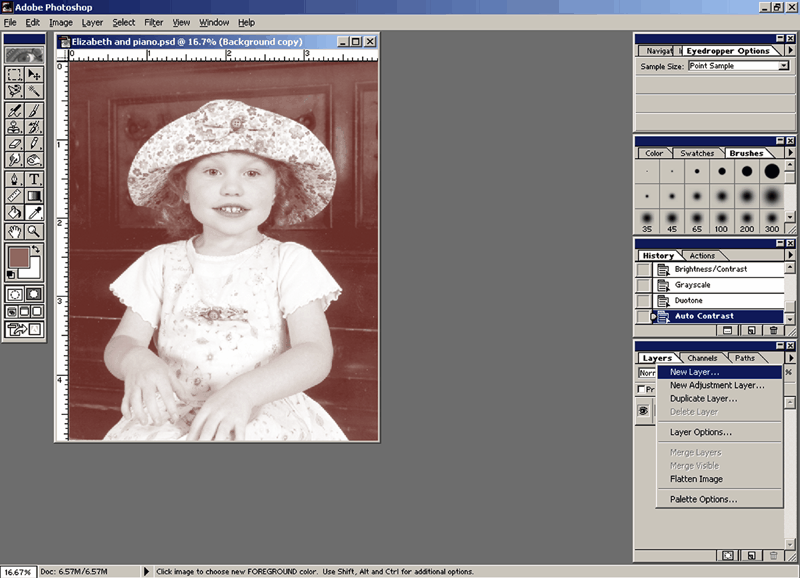
Create a new layer to color your image by hand. (click for larger image)
The image is color converted and we've got a layer to start working with, now all we have to do is decide what we're going to color and what color to make it. I like a little bit of color in a girl's lips. Not like lipstick, but just a hint of color.
In Figure H, you can see that I've now zoomed in on the lips and have colored them in using one of Photoshop's paintbrushes.
FIGURE H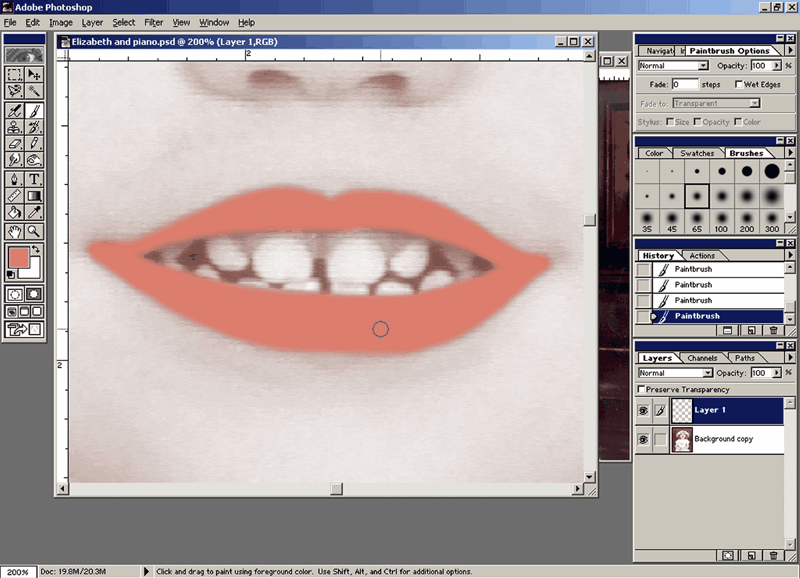
Using a paintbrush, color in your chosen area. (click for larger image)
I chose the color by using the color selector on the lips of the girl in the original, colored image. Be sure to use one of the feathered brushes and not a hard-edged one. You want the color to fade around the edges.
After the area is colored in, we want to soften it a bit. We don't want it to be in hard contrast compared to the rest of the image, but rather a subtle hint of color. We can get this effect by reducing the opacity of the layer we just colored. Figure I shows how to reduce the opacity, or make it more transparent, by adjusting the Opacity slider from the Opacity drop-down in the Layer window.
FIGURE I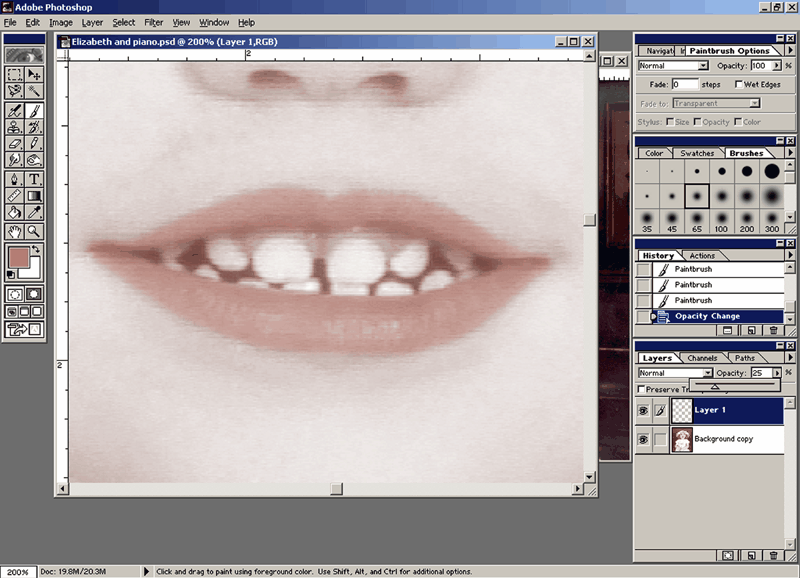
Adjust the Opacity slider to make the layer more transparent. (click for larger image)
Make sure you've actually selected the layer you want by clicking on it in the Layer window. Adjust the Opacity until there is just a hint of color. Figure J shows the final result of hand-coloring the lips and adjusting the opacity of the layer.
FIGURE J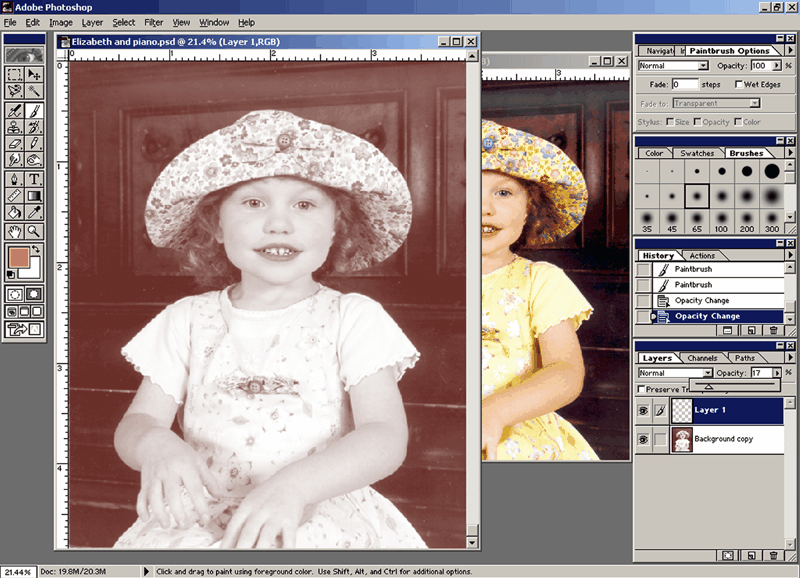
The end result of our hand-colored lips. (click for larger image)
Once you're satisfied with the coloring of a layer, make sure you save the image at that stage. Do this after each layer you color to preserve the work you've completed up to that point.
We don't want to add a whole lot of color, but a little more would fill out the picture quite nicely. We could color in the dress, but that would be too much. We could do the hat, but if we left the bow uncolored it just wouldn't look right. And if the bow were colored in it would be lost in the color of the hat. This leaves us with the shirt under the dress as a good choice for coloring. Let's do the bows too, they'll provide a nice splash of color in the middle of the hat and dress.
I've created another layer like I showed you earlier, and colored in the visible areas of the shirt and the two bows. Then I've reduced the opacity of the layer so the color is just visible, providing a nice contrast to the duotone of the rest of the image. Figure K shows the image with the shirt colored in.
FIGURE K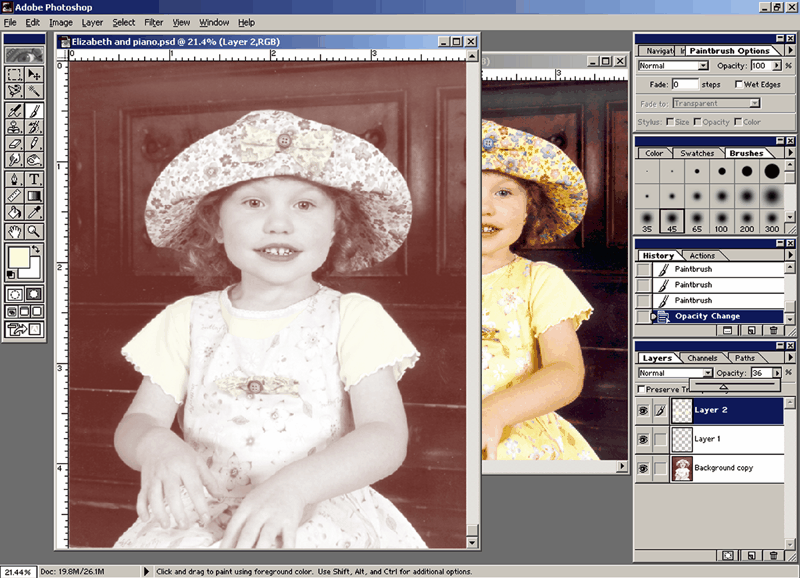
Here, the shirt and bows are hand-colored, providing a nice contrast. (click for larger image)
We're almost done, but we need one more bit of color to break up the yellow, so let's color the buttons on the bows. With another color, we need another layer. I chose the color for the buttons using the color selector on the buttons in the original, colored image. In Figure L, you can see the buttons being colored in.
FIGURE L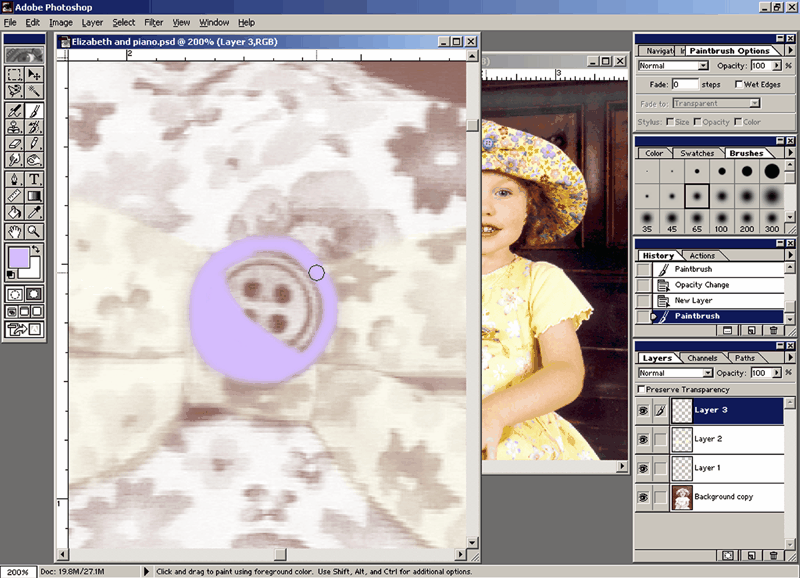
These purple buttons will break up the all the yellow in the image. (click for larger image)
After all this, I decided I didn't like the color of yellow that I used and wanted it a little deeper. Photoshop has a nice feature called Replace Color for just such an occasion. Choose Image->Adjust->Replace Color and the color replacement window will appear. I used the color selector, again on the original image, to choose the yellow from the original image.
Now all I had to do was paint over the yellow areas on that layer and only the yellow color was replace, leaving the rest of the layer intact and uncolored. You can see the Color Replacement window in Figure M, note that only the yellow areas of the layer show up.
FIGURE M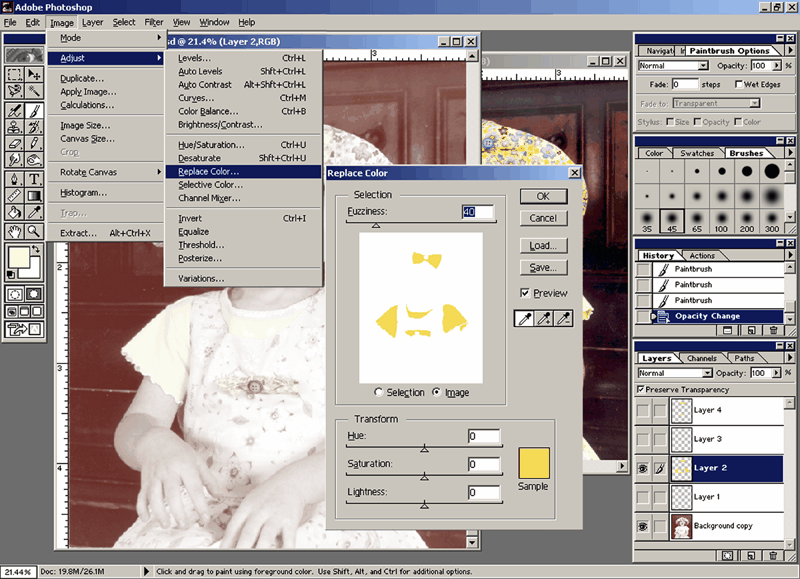
The Color Replace feature allows you to swap one color for another. (click for larger image)
In Figure N, you can see how the image looks after one yellow was replaced with another. The fuller yellow looks much better, but is still only a hint of color.
FIGURE N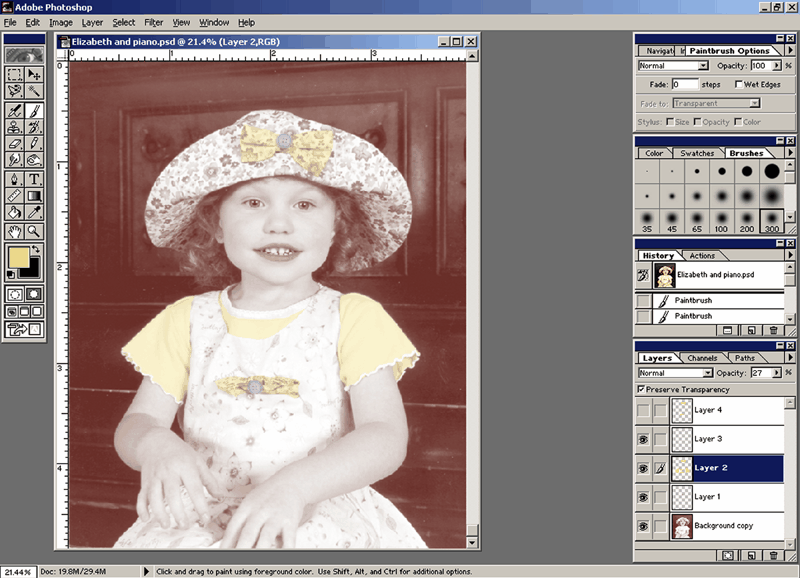
The yellow has been replaced. (click for larger image)
Finishing up
We're pretty much done with this image now. We've changed it from a standard color image to a duotone, and hand-colored several layers to provide a bit of color and contrast to the rest of the image. When you're completely satisfied with your work and feel you're finished, save the image.
Now we have to Flatten the image, merging all layers into one. Choose Layer->Flatten Image, like in Figure O, to bring all the layers together.
FIGURE O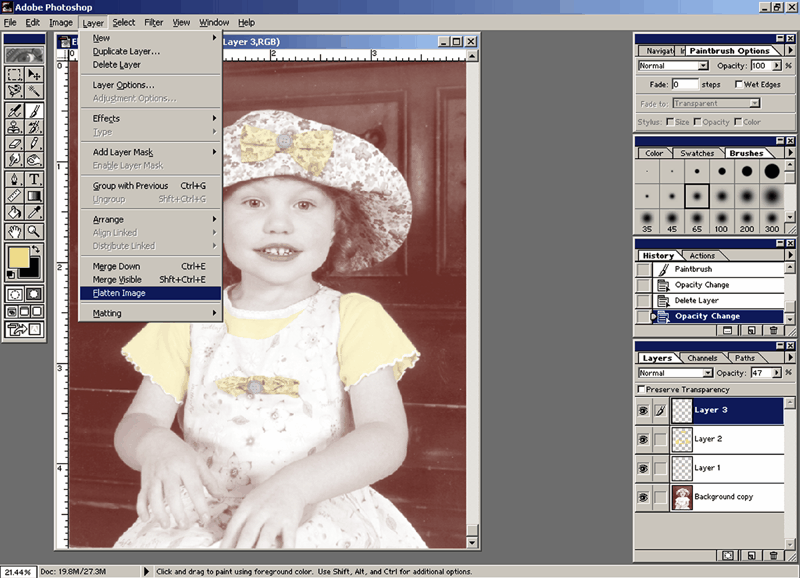
Flatten the image to complete your work. (click for larger image)
Now that your work is done, it's time to save the final image. DO NOT choose Save from the file menu, this will over-write your last save where all the layers are still intact. Instead, choose File->Save As from the file menu and save the image in the TIFF format. TIFF files are a bit larger than JPGs, but because they use a different compression method they don't cause artifact like JPGs can. Our final image can be seen in Figure P.
FIGURE P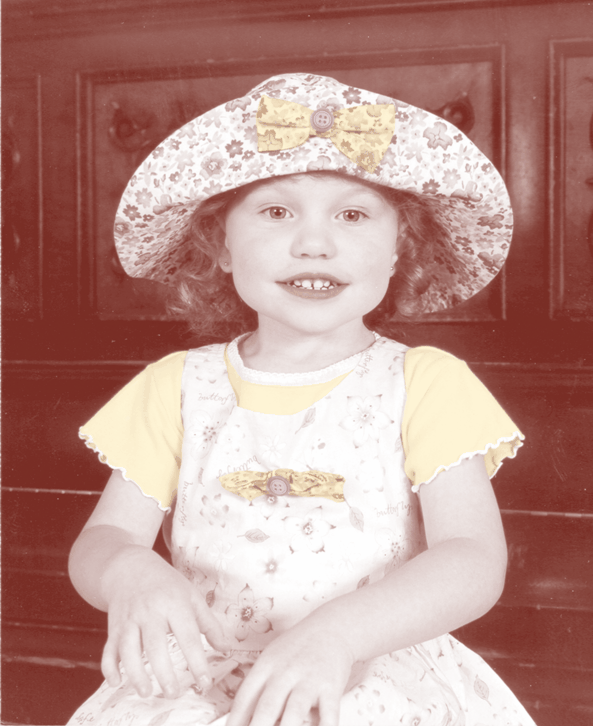
Our final version of the image in the style of Kim Anderson. (click for larger image)
Conclusion
The Kim Anderson style of photography is very popular, giving an antique flavor to images when color saturation seems to be the driving focus for most photographers these days. By using the techniques above, you can make hand-colored versions of your own images, creating your own vintage, antique works of art. Good luck and good shooting.